Open the file AndroidManifest.xml under android–> app –> src –> main. Enter the preferred app name in the label under application tag.
<application
        android:label="Enter Your Desired Name Here"
        android:name="${applicationName}"
        android:requestLegacyExternalStorage="true"
        android:icon="@mipmap/launcher_icon">
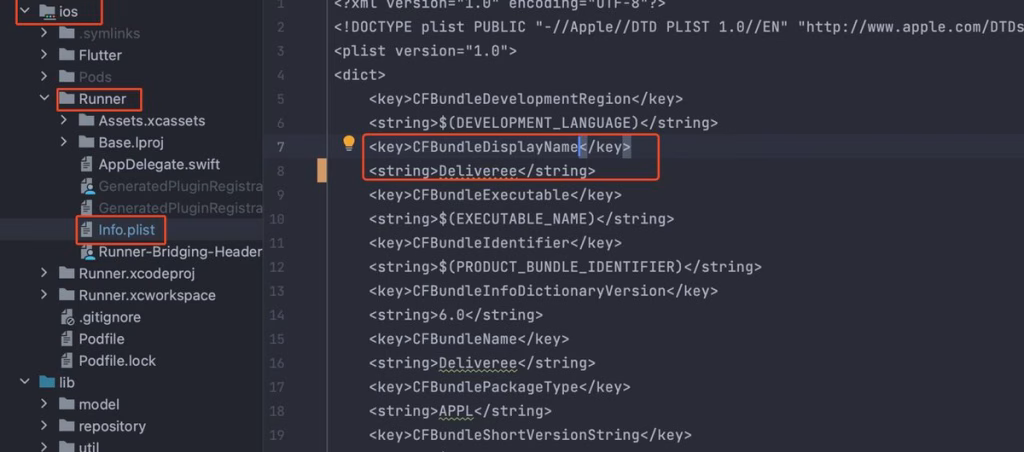
iOS
For iOS, change the name for CFBundleDisplayName as shown in image below.
To change the package name, Run this command to change the package name. Open terminal in your IDE and run
flutter pub get
flutter pub run change_app_package_name:main com.new.package.name
Important : your applicationId or package name must same with your package name that you’ve create on firebase console when you generate google-services.json
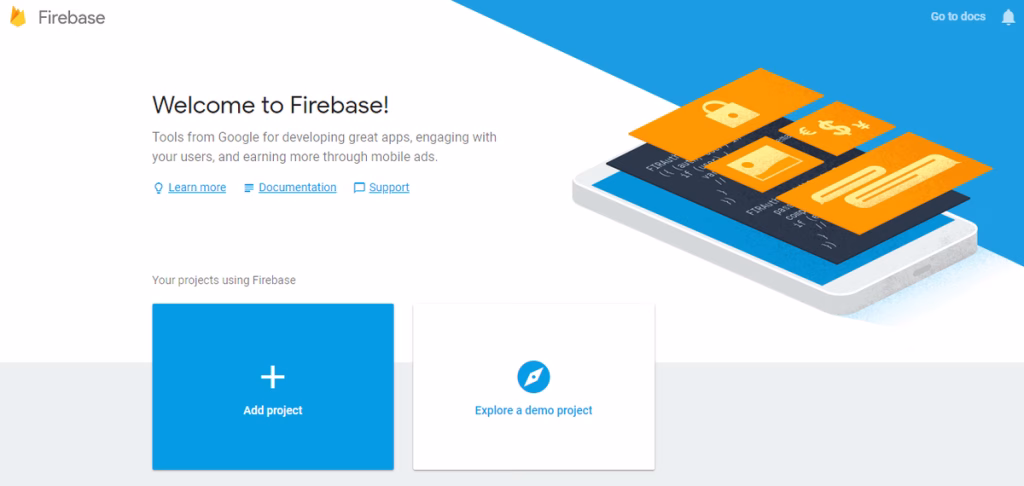
Please register or log in first and then select create new project. In the dialog window enter the name of the project that will be created and the contents of the state and then click the create project to continue.
1) Add a new project
2) Get started by adding firebase to your project. Select the flutter icon.
3) The easiest way to get you started is to use the FlutterFire CLI.
Before you continue, make sure to:
Install the Firebase CLI and log in (run firebase login)
Create a Flutter project (run flutter create)
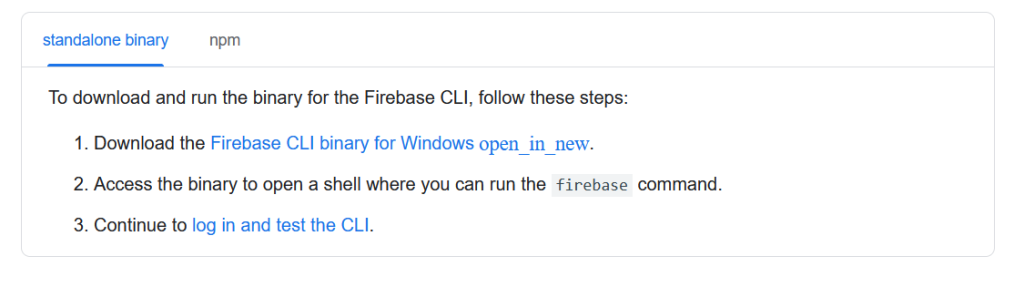
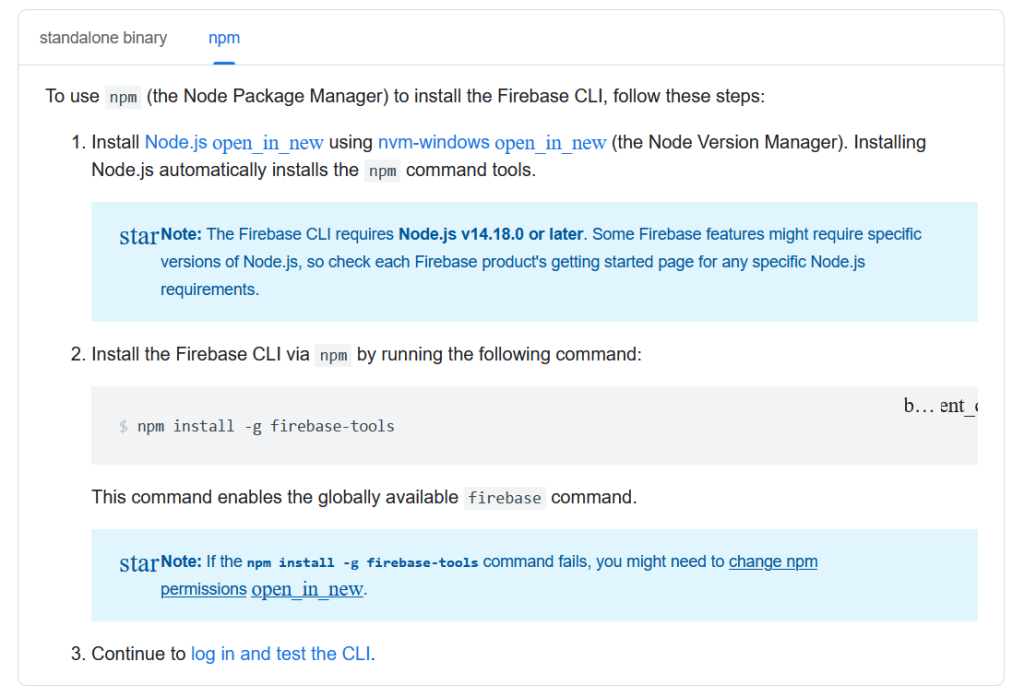
4) In firebase CLI Install standalone binary and npm
5) Log in and test the Firebase CLI
firebase login
firebase projects:list
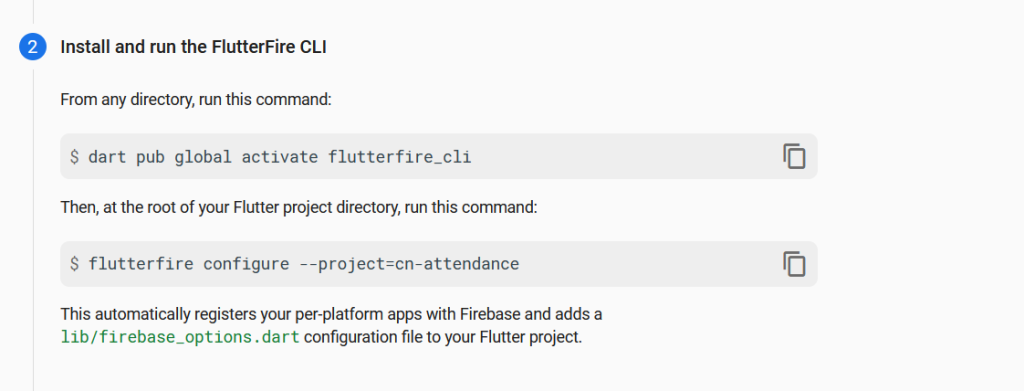
6) Install and run the FlutterFire CLI
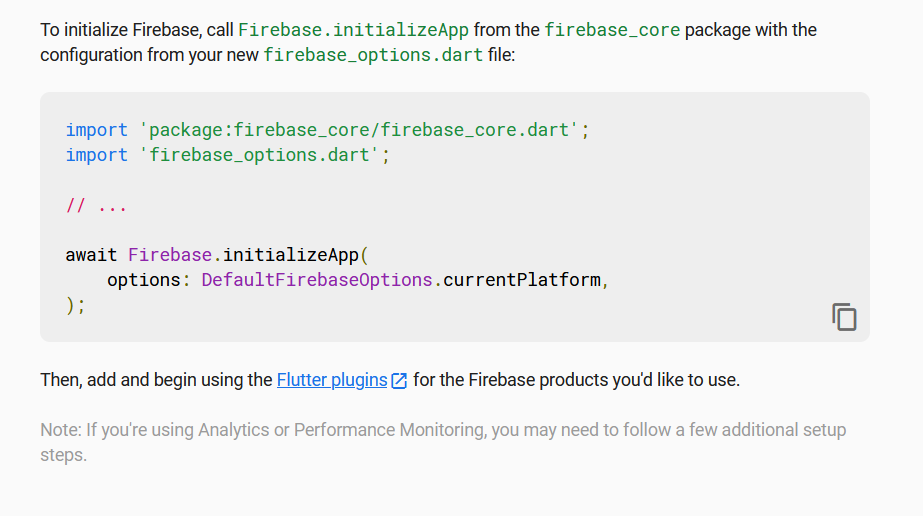
7) Initialize firebase
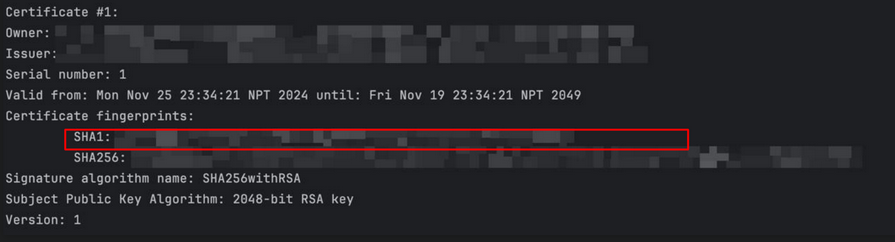
Add your SHA1 Key
To add an SHA-1 key to your Firebase project for Google Login, follow these steps:
Step 1: Get Your SHA-1 Key
The method to retrieve your SHA-1 key depends on how you’re developing your app:
For Debug SHA-1 (Android Studio)
Open a terminal in Android Studio.
Run the following command: ./gradlew signingReport
Look for SHA1 under the debug section.
For Release SHA-1 (Production APK)
If using a release keystore, run: keytool -list -v -keystore path-to-keystore.jks -alias your-key-alias -storepass your-store-password -keypass your-key-password
Replace path-to-keystore.jks with your actual keystore file path.
Replace your-key-alias, your-store-password, and your-key-password with your credentials.
For Play Store (If Using App Signing by Google Play)
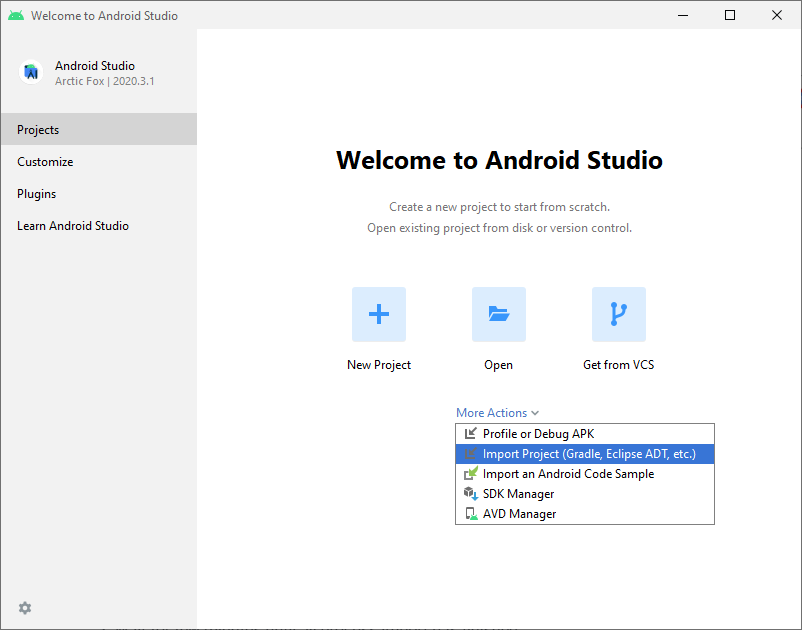
Extract .zip you download from Codecanyon, you will see some file and folder. We named project folder with “ flutter“, the project location inside android_studio folder.
When your Android Studio ready you can open it and you will see display like this
Wait for few minutes until all process import has finished.
Additional Steps
Sometimes, the Gradle Build fails. In some cases additional components are needed, Android Studio will ask you to do download these additional SDK components in the ‘messages’ tab, simply follow the instructions provided to install and download the additional components.
Since this project uses flutter SDK, you must install flutter sdk. Flutter is an open-source UI software development kit created by Google. It is used to develop cross platform applications for Android, iOS, Linux, macOS, Windows, Google Fuchsia, and the web from a single codebase. To instll flutter in your device follow this link and install flutter sdk. Make sure to use recent flutter sdk or else the project may not properly run. Install flutter as per your need, if you need have windows then install flutter for windows and if you need it for both platforms you will need to install flutter for both the platforms. Click on the link below to install flutter SDK.
In order to start developing, you need to install Android Studio. You also need the ‘Java SE Development Kit’. First, download Android Studio here (https://developer.android.com/studio/index.html). Next, you will be redirected to the installation instructions (https://developer.android.com/studio/install.html) which provides instructions on Installing Studio, and a download for the JDK (http://www.oracle.com/technetwork/java/javase/downloads/jdk8-downloads- 2133151.html). Note: Android studio with version 2020.3.1 or above is required for this application to run and if you already developed android project you can SKIP this page.
Mac
For mac, the installing process for Android Studio is same. You will require Android Studio to run android application.
If you want to run iOS application, you will need to install xCode. Here are the steps: